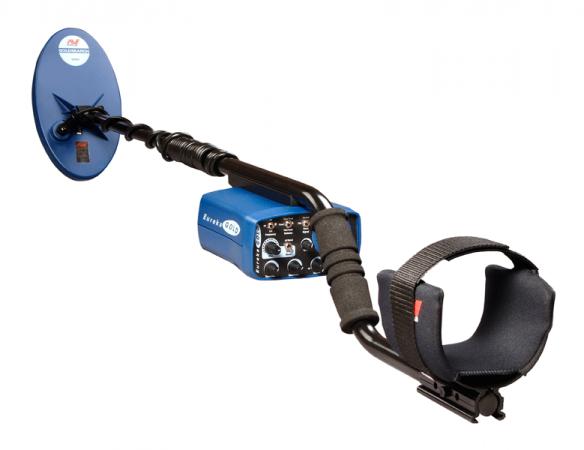
Recently I was asked by a friend of mine to find out what's in DIY about gold detectors, for its experimental purposes. So I started searching as it is something I have never again dealt with.
Note.: This post is informative and is of course intended for hobbyists. Do not use it to do something illegal.
The following kit is for the detection of metals in some depth or elsewhere, such as on a beach. If you are looking for something easy, fast and simple to use (at a small depth, such as wall cords), view this this Android App.
Types of detectors
There are different metal detectors categories. To choose a detector you should consider the cost, the area you plan to cover and, of course, the material you want to pull from the earth.
Below are three of the main types of detectors.
Very Low Frequency (VLF)
The VLF type detectors are the most common metal detectors and cover different types of metallic objects and naturally different soils. They are, however, the most unstable detectors. The VLF detectors use two coils in one. The outer coil, which acts as a transmitter, where it creates a magnetic field above or below the ground. This magnetic field is easily disturbed by some buried material, such as a coin, a golden or even a can of beverage. The inner coil detects the magnetic field that has already been created and after it amplifies it, it sends it back to the mechanism for the operator to analyze it. In fact, the operator listens to the tone and understands the material the detector has hit. Of course, these devices need good coordination so that they do not "hit" useless items, but you can never be sure if you coordinate it well and a bad coordination can make you lose some good pieces.
Pulse induction (PI)
The PI detectors are the most widespread detectors among gold researchers, mainly because they have the ability to detect objects buried deep in the ground, filtering the black sand noise and magnetite. These detectors are especially useful for those looking at the beaches, since they are able to reject the electromagnetic waves generated by salt water, which confuses the VLF detectors. PI type detectors are also used at airports. The way these detectors work is simple. Their coil (usually a single coil, which serves as a transmitter and receiver, but there are constructions that have up to three coils), creates a magnetic field that is faced to the earth. When there is an object on the ground, it creates a corresponding field, which received by the coil and send it to the controller, where it controls it and notify accordingly.
Beat-frequency oscillation (BFO)
The BFO type detectors are the most basic metal detectors. They are ideal for those who want to spend a little money, for hobbyists, for those who want to try the basics or for those who just want a cheap metal detector. These detectors use two coils, one large and one smaller. The detector creates radio waves, which are interrupted when an object is found in their field.
Building the Detector
So, after searching and reading related discussions on the internet, I came to something that provides you with the materials and the PCB board, the Surf Pi 1.2, which is Pulse induction (PI). Of course I also found circuits for stronger detectors, which I have not tried yet because I did not have time. If I need it in the future, I will do it, since it is a very powerful metal detector with a great depth capability.

Also Needed
Note.: These links are from dealextreme, a cheap online store with free shipping in Europe (although it takes about 3 weeks to receive your order). They are also not necessary, so you can put something else in their place.
- 3 x 3.7V lithium batteries (sold in a pack of 2, so you should get 2 packages)
- A battery charger
- One case for 3 batteries
- A case for the detector board. It can be a waterproof and relatively cheap, όπως like this one.
- A male and a female RCA type connector (good quality) to connect the coil . The female should be adaptable to the box and not for PCBs.
- Speaker cable for the construction of the coil (24awg).
- Alternatively, we can use copper enamel wire (24awg, 0.5mm), which can be purchased from motor winding or from an old motor (as I did and you can see it below).

The building of the detector is relatively simple and will not confuse you. All the materials are easy to see on the board to be soldered and following this part list, it will not take you over 40' to finish. Both the integrated chips and the transistors correct place is printed on the board so there is no wrong placement. The kit also comes with the necessary potentiometers for the necessary settings, as well as the cable trays so that you do not stick wires on the board.

Surf PI 1.2 kit, as you will see in the previous photo, comes with what you will need to make it work. However, you will need a box for the board, a power supply (eg batteries), something to hold the coil at a distance (usually a plastic tube), as well as the construction of the coil, which is the main piece of construction along with adjust the detector.
The Coil
The coil is probably the most critical matter in such detectors. Many discussions and many tests are online to search. The simplest way is to get a motor winding wire and wrap it in something plastic, such as a lid from a non-recordable DVD case. I "cut out" from an old motor (not burnt, because then the painting that has the wire will have gone and will not work for a coil) and I put it on an electro-welding wire reel to wrap it. The coil I tested was 3.3 Ohm, but as I have read the resistances are between 1.4 to 4 Ohm.

Voltage Check
With the battery connected, place your negative probe on GND and by placing the positive probe on the following pins you should achieve the voltages shown:
Note: These figures will vary depending on the actual voltage of your battery setup, but it does need to be 12v or thereabouts.
U1 (NE555) pin 8 -- +12v
U2 (NE5534) pin 7 -- +4.97v
U2 (NE5534) pin 4 -- -4.75v
U3 (LM358) pin8 -- +4.97v
U3 (LM358) pin4 -- -4.75v
U4 (4093) pin14 -- +4.97v
U4 (4093) pin7 -- -4.75v
U7 (4066) pin14 -- +4.97v
U7 (4066) pin7 -- -4.75v
Then adjust pin 6 on U2 or (TP2) to 0v with the Offset trim pot (P1).

Connecting a coil
Now that you are getting sound from your speaker the next thing to do is connect a coil. The surf PI works best with a coil of around 300uh inductance, similar to the coils for Minelab PI's.
If you have a commercial coil that you intend using, that should make things easy, otherwise I would guess you plan to make your own.
Once you have the coil connected you need to adjust the Delay trim pot (P3). If you do not have an oscilloscope the best way to do this is by adjusting the pot while you wave a metal object over the coil. e.g. Gold ring until you get the best response at the furthest distance from the coil.
In the following video we see the detector in action and the different sound in each material
One of the detector's uses
Some of the features of this metal detector
- Adjustable pulse delay to reduce the noise of the metal detector from the black sand.
- A pulse metal detector for extraordinary depth in coins and jewelry.
- Enhanced gold sensitivity.
- Boost control is set for specific beach conditions so you can gain every inch of pulse depth and sensitivity.
- Quick Goal Targeting, so you can listen to desired goals even among scrap metals.
- Auto Ground Discharge.
- Suitable for searches and scouts in lakes, rivers, seas and sandy soils such as beaches.


