HomeBrewGr
How to install custom firmware on PSP 2004 (slim)
As you may know, PSP Slim (v2004) can't be hacked easy, in case you want to run homebrew apps. This tutorial shows you how to do it easily and install custom firmware (CFW).
You must "tell" PSP to run in Service mode, to be able to run CFW. To do that, you must first make your Memory Stick seems as a Service one and second, to hack your PSP.
How to
Step 1: Download the original 3.90 firmware. Unzip it and move the EBOOT.PBP somewhere you can access it quickly (eg C:).
Step 2: Download and install PSP Grader v005. This program can "fix" the Memory Stick and make it bootable.
Step 3: Connect your PSP to your PC. Normally, the program will recognize your PSP. If not, put manually the letter assigned to your PSP (eg J:).
Step 3a: Select "Open" and select the EBOOT.PBP file. Keep checked the "Select IPL" as TimeMachine IPL.
If you have other files into the Memory Stick, don't select the "Format Memory Stick" option.
Step 3b: Click on "Create Pandora Stick". A new window will notify you when is ready.
Now the Memory Stick contains the 3.90 firmware and the needed files from M33. But there are some steps yet.
You have to make your battery as "Service battery", so your PSP can runs in Service mode. Every PSP battery have a unique serial number inside its EEPROM, which is checked during the boot up. If is a "normal" battery, then the PSP runs in "normal" mode, otherwise enters in "Service" mode.
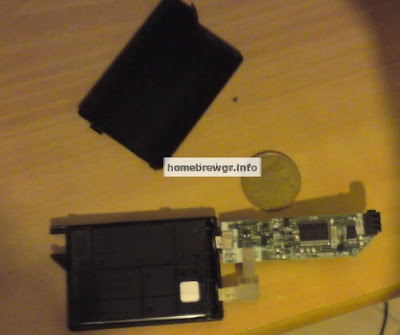
Remove the battery from PSP (and the Memory Stick). With a knife, open the bottom side of the battery, in the mark the battery has. When the knife is inserted a bit, try to open the battery. Be careful to not insert the knife deep inside and harm the PCB. Otherwise, try with a screwdriver. Take your time and try to open the battery without harming it.
 |
| As you can see, there is not enough space. |
When you are ready, find the spot on PCB with the number "19" on it. Check the below image for more information. Next to that number, is the point where you must cut the trace. This will make the battery to hide its serial number.
 |
| The cut point. Beware. |
You can now close the battery, with little tape to keep the plastics together (or glue). When you insert the battery into PSP, you will see the LED light up. This means that your battery is OK. If the LED is not lighting up, repeat the trace cutting, maybe is still close.
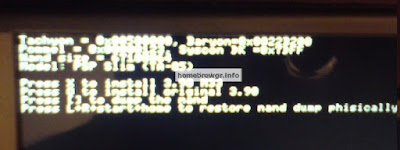
Remove the battery from the PSP and insert the Memory Stick. Press and hold L and insert the battery. Your PSP will power up and you will see a black screen. From there, you have the below options:
Press X to install 3.90 M33
Press O to install original 3.90
Press [ ] (square) to dump the nand
Press L+R+start+home to restore nand dump physically (dangerous!)
Press square. This will save the original firmware. When finish, your PSP will turn off. If you get a "bad Blocks" warning, is normal, don't worry. Repeat the steps above, so you see the black screen again.
Now press X and wait. Don't turn off your PSP, unless it ask you to do it with X. If you turn your PSP off, it will be destroyed.
When finish, it will ask you to press X, press it and your PSP will turn off. Now you can turn it on normally, as you always do. You can keep the battery in "Service mode".
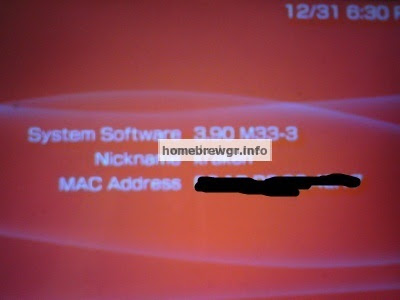
Now check if the FW has been installed correctly.
Some programs and games are not playable. To run them you have to setup the M33 firmware. Turn the PSP off and keep pressed the R, while turn it on. You will get the CFW's menu, where you can set up the CFW.
The options are:
Skip Sony logo

UMD Mode – M33 Driver -NO UMD.

Use VshMenu

Charge battery when USB cable plugged -> USB Connection command.

Use M33 network update


